Namaste Everyone,
Hope you are doing good!
The Use Case:
Every day, I want to gather all the contacts created today in Dataverse. Then, I want to organize them in a tabular form in a word document using Power Automate.
Change content control properties of word file:
If you don’t have developer tab in word then add it first, right click on any option in ribbon, you will be able to see “Customize the button”.
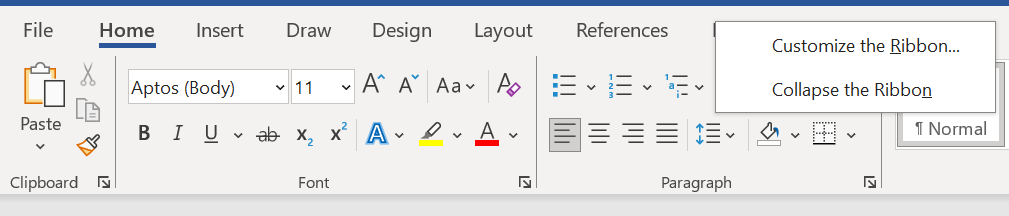
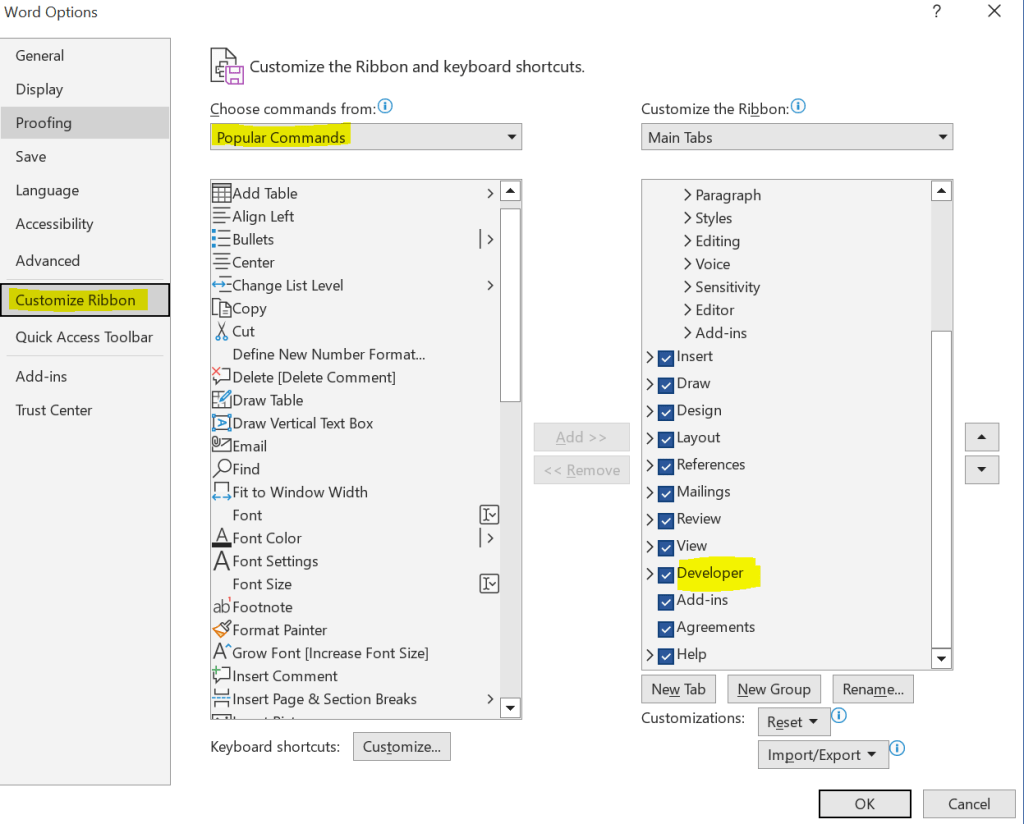
Now select Developer from left section(“Popular Commands”) and add it in the right section(“Main Tabs”) and save it.
To update the content of the word file, you’ll have to incorporate content control properties within the document. To do this, first select the text you want to replace. Then, go to the Developer tab and select “Aa” (Plain Text Content Control).
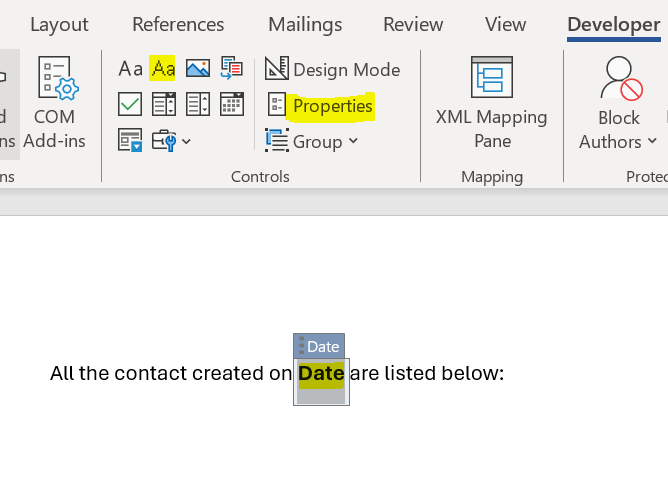
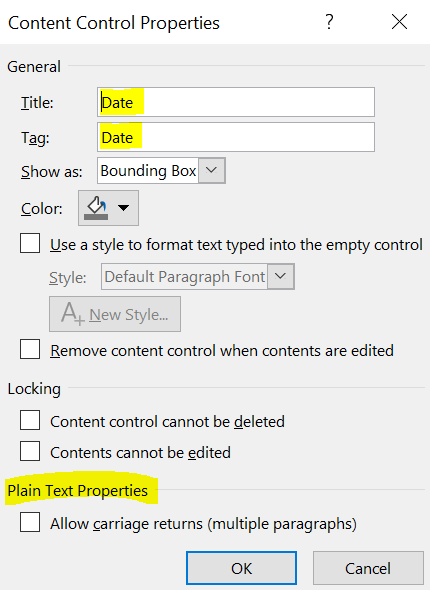
Afterward, select “Properties” and fill out the Title and Tag fields.
We’ll switch out the word “Date” with the actual date when the document is created.
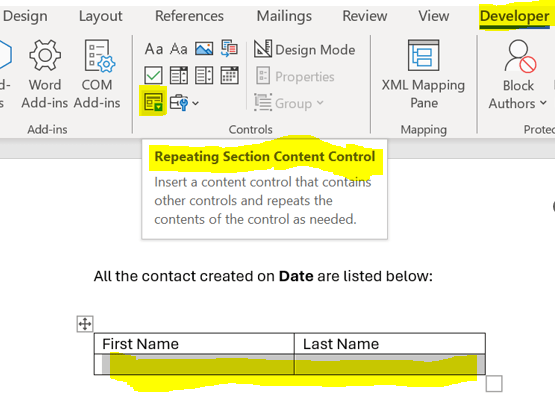
Now we will add controls for repeating section, To add this control select the area where you want to add the control and do to “Developer” tab, click on Repeating Section Content Control (as highlighted below):
Now open properties and fill out Title and tag:
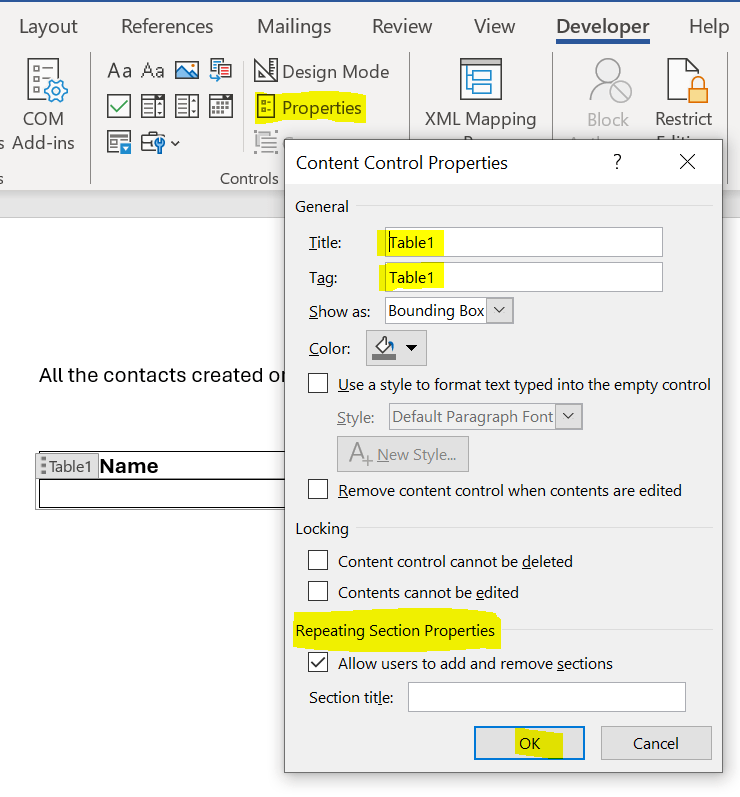
After filling out repeating section properties, we have to add content control properties inside repeating section.
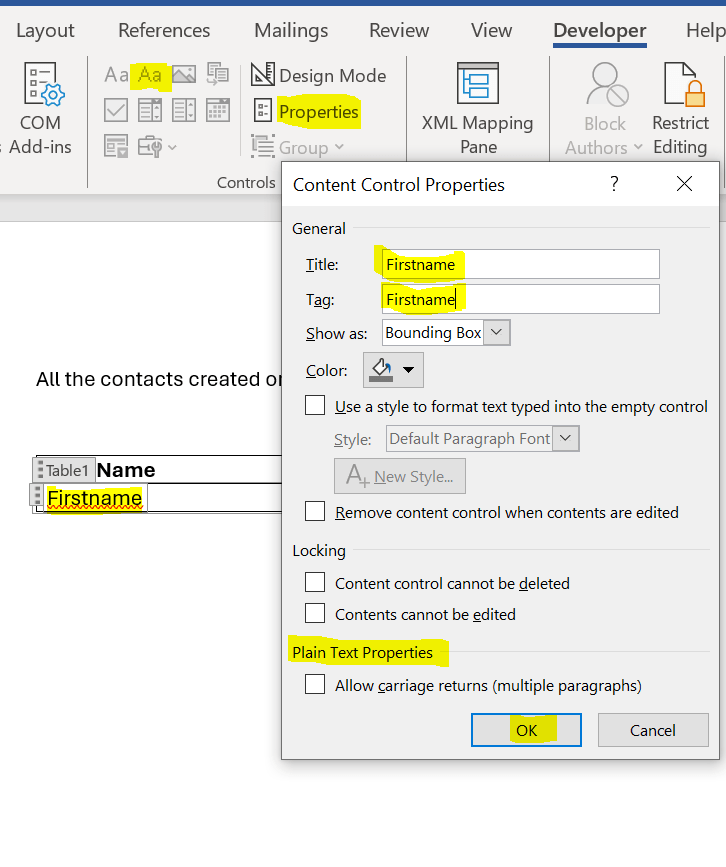
To add the First name in repeating section, select the text(“Firstname”) and then click on “Aa” (Plain Text Content Control) and then click on Properties to add Title and Tag.
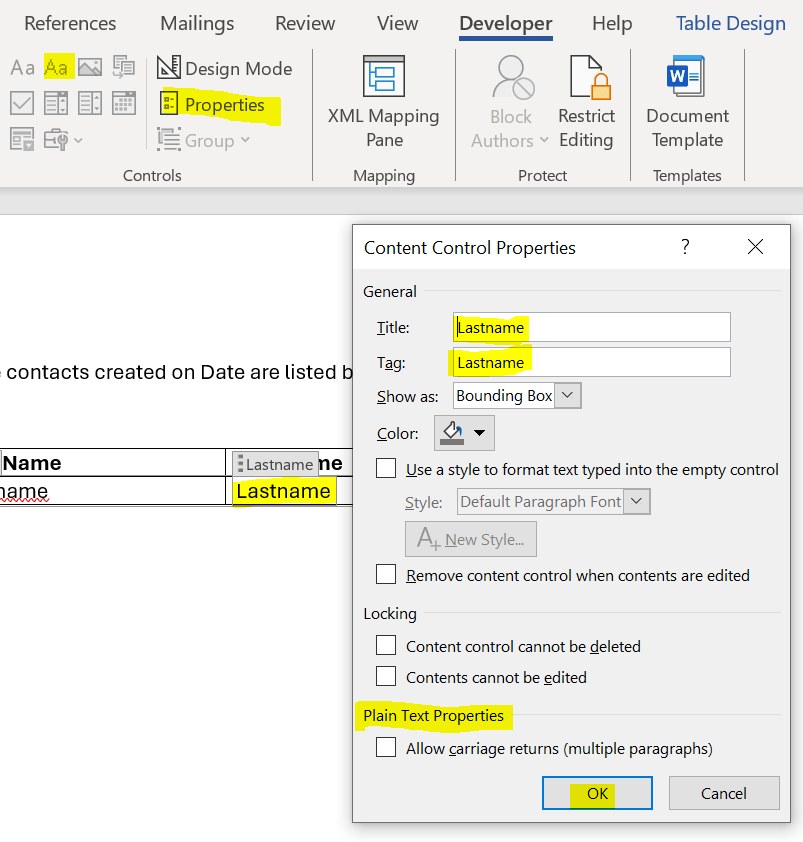
Repeat the same for Last name as well.
We are all set with content controls, for Power automate flow refer to our next blog.
Hope it helps!
Thanks for reading!
#Let’s_Learn_Together
Stay tuned with Power Spark for continuous learning.
Thank you 🙂

Leave a comment