Namaste everyone,
Hope you all are doing good 😊
Welcome back to Part 3 of our series on Power Apps Grid Control features. If you missed the previous two parts, you can catch up on them here:
Part 2: Enabling Aggregation in Dynamics 365
In this blog, we will learn about Jump Bar (Also, known as Alphabetical filtering) and Editable grid.
Introduction:
Editable Grid: With thehelpof Editable Grid, we can edit records within a subgrid without even opening the records.
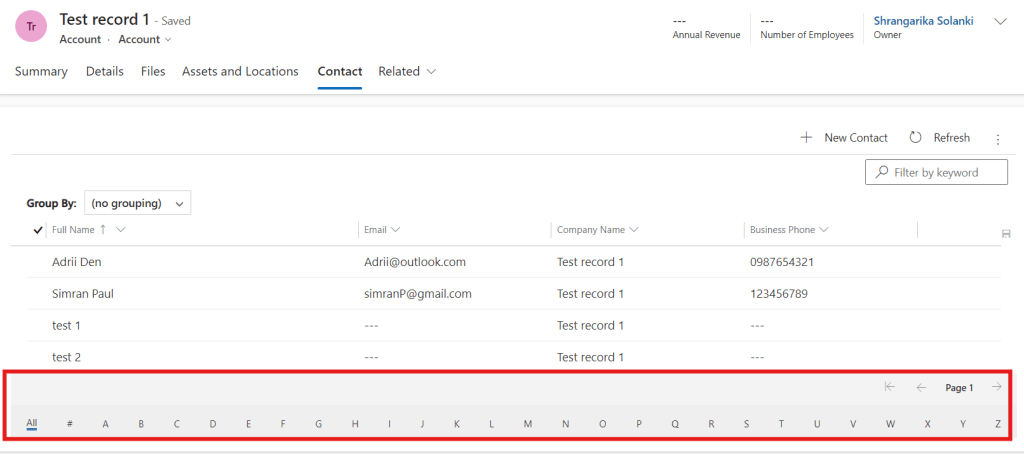
Jump Bar: The “jump bar” is essentially the alphabetical selection bar located at the bottom of the view page. It allows users to quickly navigate through records by selecting different letters of the alphabet, effectively jumping to that specific portion of the records.
Implementation:
Let’s follow below steps of adding Editable Grid followed by Jump Bar to the subgrid:
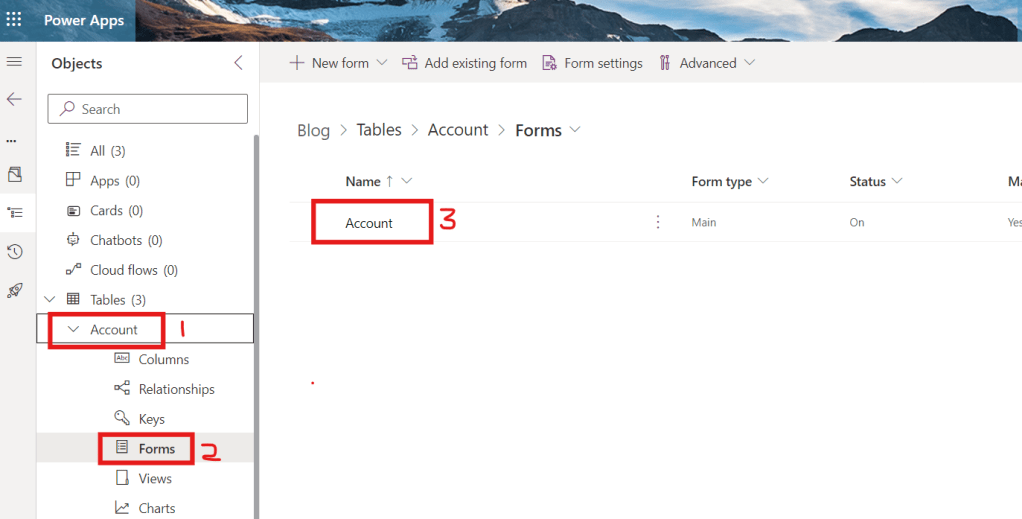
Example: In this example, we will add editable grid of related Contacts on Account entity and then will enable jump bar.
- Navigate to https://make.powerapps.com/ and select your solution >> Account entity >> Forms >> Account Form
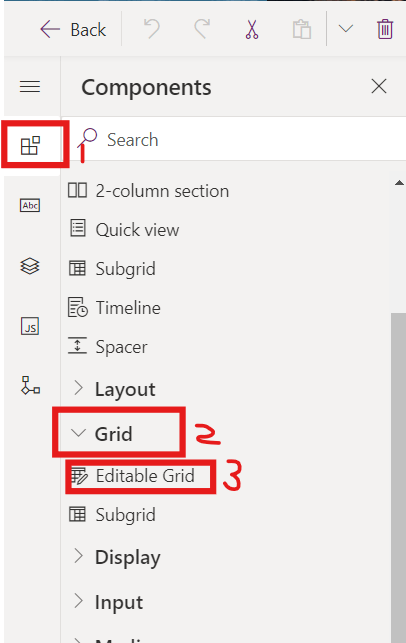
- From the left navigation, select Components >> expand Grid >> select Editable Grid (Add this editable in a new tab)
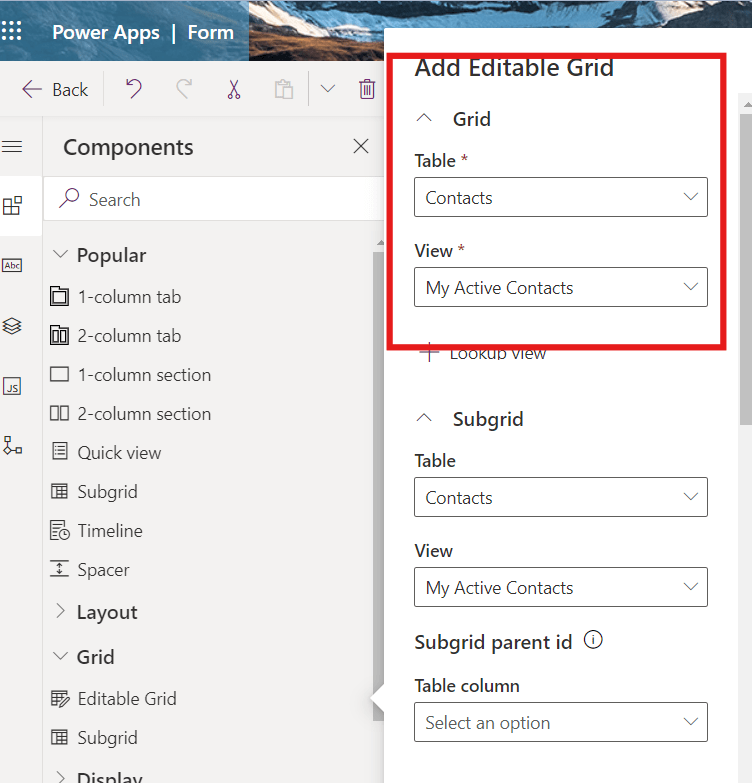
- Now, select “Contacts” as tables and “My Active Contacts” as View then click on Done.
- Update Label Name and Name and click on “Save and Publish”. We now can edit records within a grid without even opening records.

Let’s activate jump bar for the same Contact Editable Subgrid.
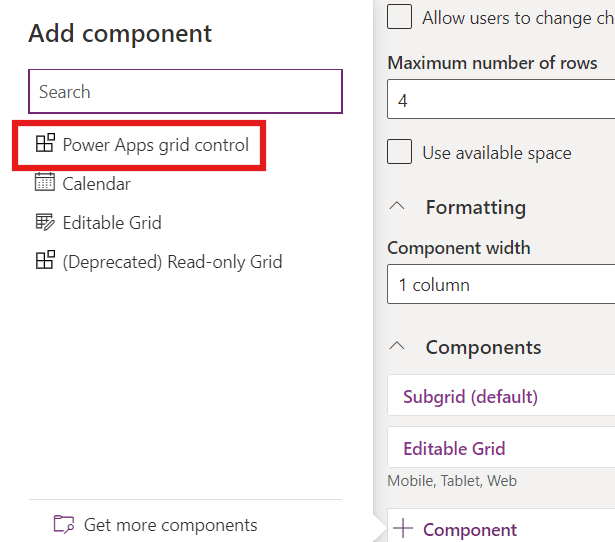
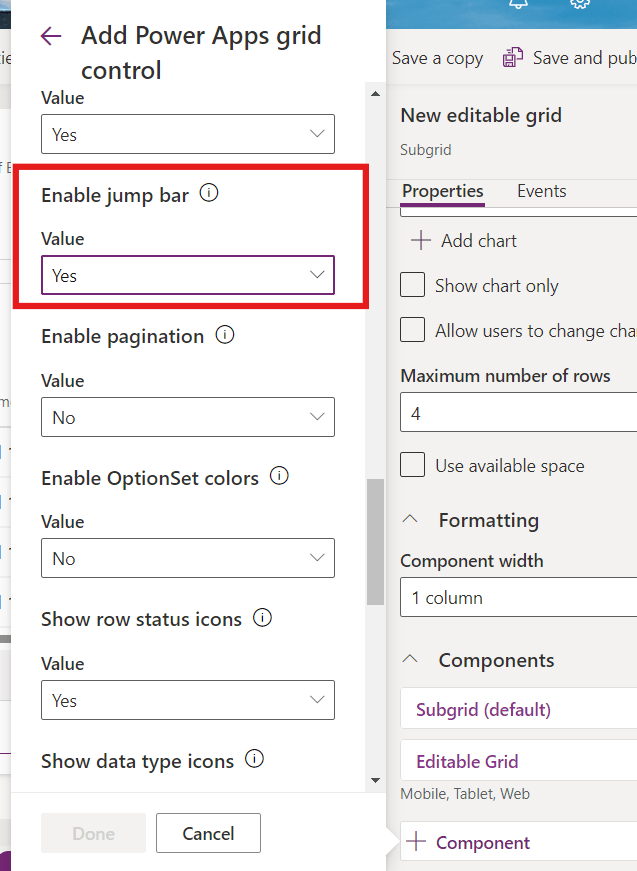
- For that, select Contacts subgrid then from properties pane click on +Components.

- Select Power Apps Grid Control
- Set “Enable Jump Bar” value to “Yes” then Save and Publish your changes.
- Now, refresh the subgrid and now you will be able to see jump bar in bottom of the page as shown in below snapshot.
Hope it helps!
Thanks for reading!
Lets_Learn_Together
Stay tuned with Power Spark for continuous learning.
Thank you 🙂

Leave a comment