
A solution in Power Pages serves as a container for different components, which include both Website Configuration and Dataverse Components.
- Website Configuration covers all the settings and configurations for the Power Pages site, such as page layouts, templates, themes, and other design-related elements.
- Dataverse Components consist of tables, forms, views, and business logic like workflows and business rules.
By bundling both website and Dataverse components into one solution package, you can utilize advanced Application Lifecycle Management features to deploy your websites to target environments using managed solutions.
In this blogpost, we will explore:
- Enable Enhanced Data Model
- Add Power Pages Site to the solution
- Add components in the solution
Enable Enhanced Data Model:
Enabling the Enhanced Data Model in Power Pages is essential for achieving seamless integration with Microsoft Dataverse. This enhanced model enables you to leverage tables, relationships, and business logic, providing a robust, data-driven experience for your users.
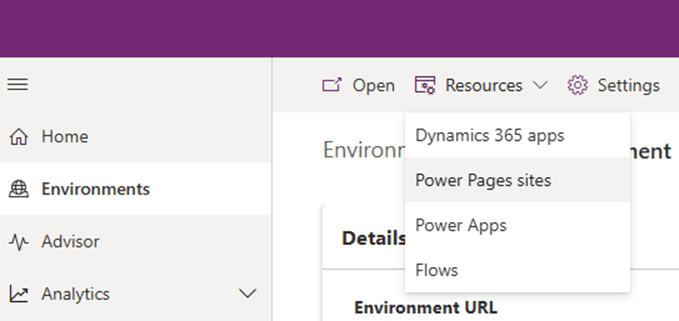
- Go to Power Platform Admin Center
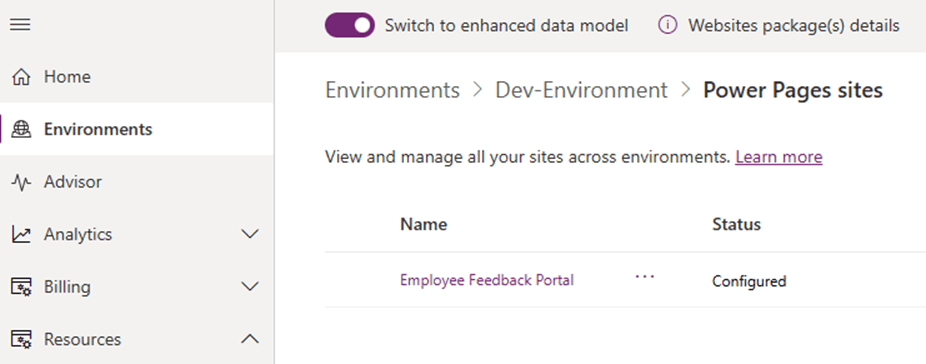
- Click on Environments >> Select your desired environment >> Resources >> Power Pages Sites
- Enable “Switch to Enhanced Data Model” option from header
Add Power Pages Site to the solution:
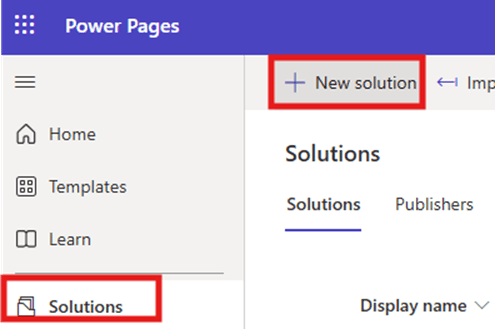
- Go to Power Pages Studio
- Click on Solutions >> + New Solution >> Give required information to create a solution and click on Create. (You also may select an existing solution if already created)
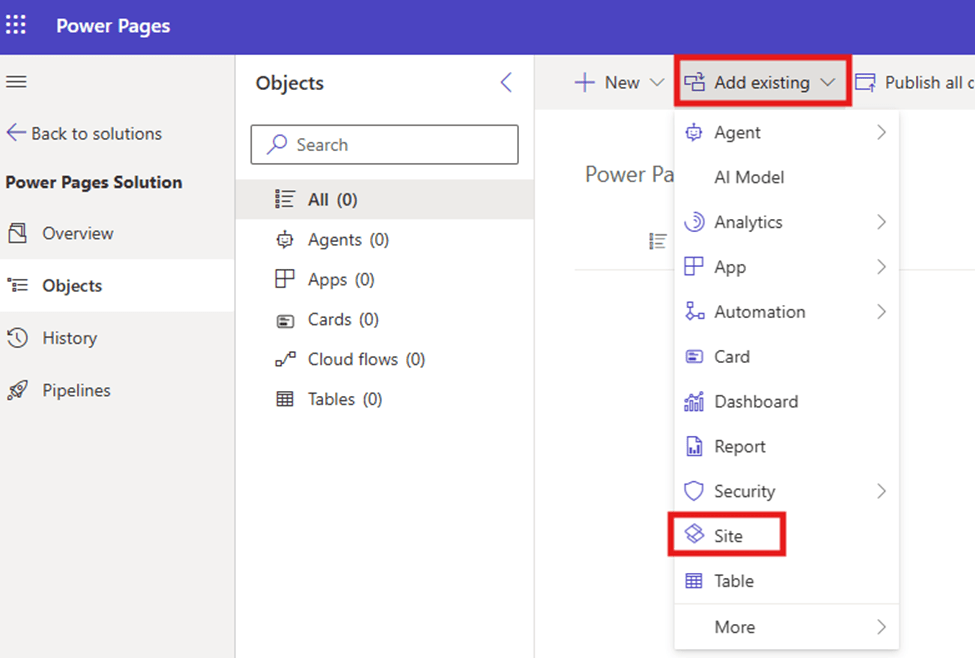
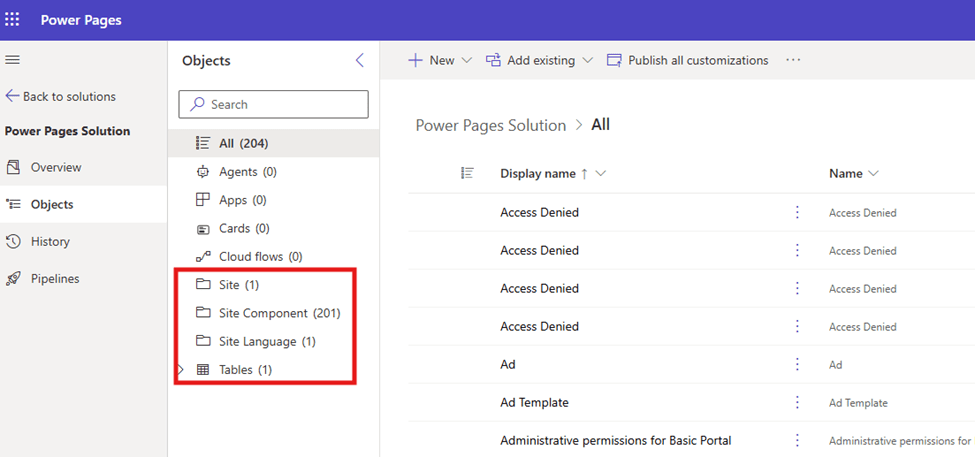
- Let’s first add “Power Pages Site” into the solution. Click on Add Existing >> Site
- Select the site and click on “Add”
- It might take some time to add all the components in the solution. Once done, you may see all the related components are also added into the solution.
Add components to the solution:
Suppose after adding Power Pages Site into the solution, you have created a new component from Power Pages Editor, then we need to add newly created component individually in the solution.
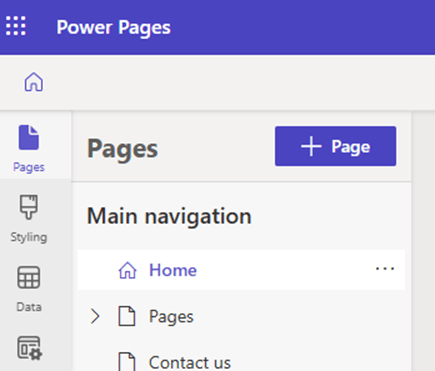
- Go to Power Pages Editor and select a site you have added earlier in the solution.
- Select Pages from left navigation and click on + Page
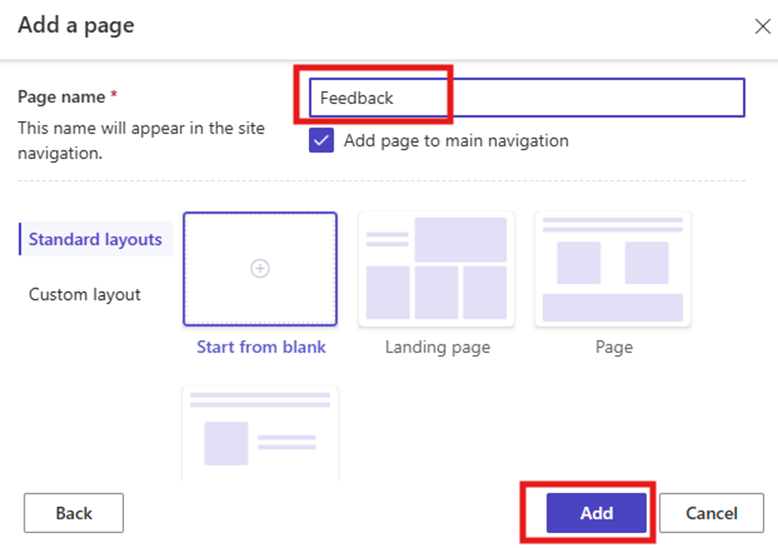
- Give a name to your page and click on “Add”
- Now, go back to the solution >> Add Existing >> More >> Other >> Site component
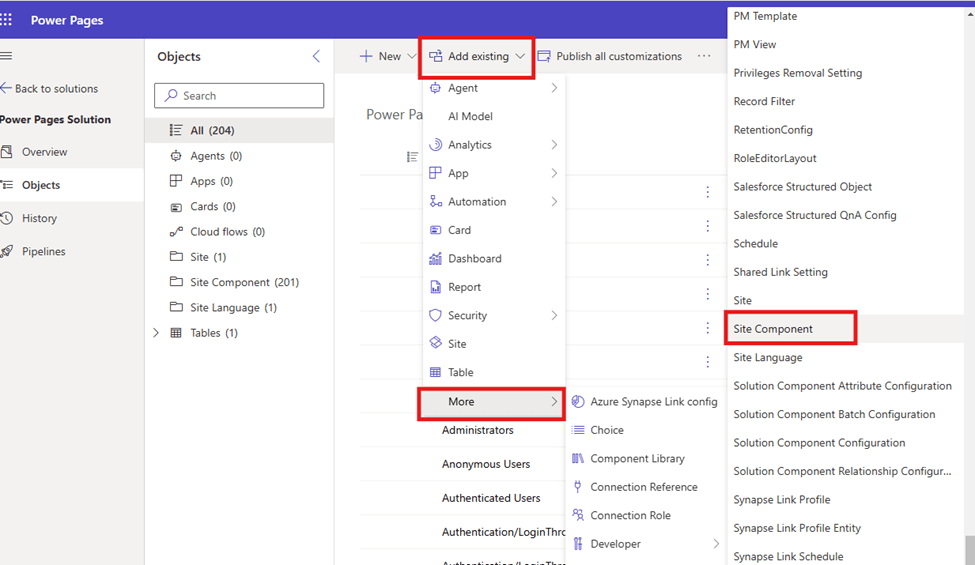
- Select the component which you want to add and click on Add.
Note: After adding all the required components, export the solution as managed solution and import in the target environment. Do not forget to “Activate” the site in the target environment post deployment.
I hope by following the above step-by-step process, you get an idea of how to manage solutions with Power Pages.
If you find this blog useful, please like, share and subscribe to my channel for continuous learning.
Thanks for reading. 🙂
#Let’s_Learn_Together #D365 #Msftadvocate #PowerPagesLearning #Microsoft #PowerApps #Learning #Microsoft

Leave a comment