
Hello everyone,
Hope you all are doing good!
In Dynamics 365 Power Apps, Main Forms serve as the user interface that allows individuals to interact with the data necessary for their tasks. It’s crucial that these forms are designed to enable users to efficiently find or enter the information they need.
This blog provides a step-by-step guide on how to manage access to Main Forms in Dynamics 365 CRM, ensuring users can efficiently find or enter the information they need.
Why Manage Access to Main Forms?
- Data Security: Restrict access to sensitive information within forms to ensure only authorized users can view or edit it.
- Improved User Experience: Reduce clutter by displaying only relevant forms.
- Role-Based Access: Ensure users see forms applicable to their responsibilities.
- Optimized Performance: Limit the number of forms available to users to avoid unnecessary database queries and improve system performance.
Understanding Main Forms
Main Forms in Dynamics 365 CRM are essential components that provide the user interface for interacting with data. They are designed to help users efficiently find, enter, and manage information necessary for their tasks.
Types of Forms in Dynamics 365
Main Forms: The primary form type used for data entry and viewing. Supports multiple tabs, sections, and sub-grids.
Quick Create Forms: Simplified forms designed for quick data entry. Typically used for creating new records with minimal required fields.
Quick View Forms: Used to display related entity data within another form.Provides a quick overview without navigating away from the current form.
Card Forms: Compact forms used in interactive dashboards. Display key information in a concise format.
Managing Main Forms involves security roles, customizations, and access rights adjustments.
Restricting Access to Main Forms
Option 1: Using Security Roles
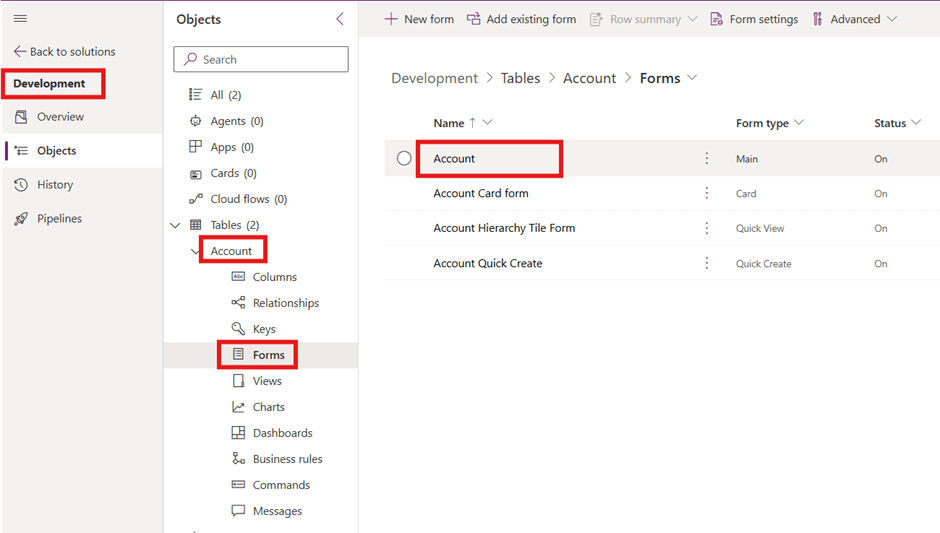
- Navigate to Power Apps (make.powerapps.com).
- Select Solutions and open the desired Table.
- Click Forms and locate the Main Form to restrict.
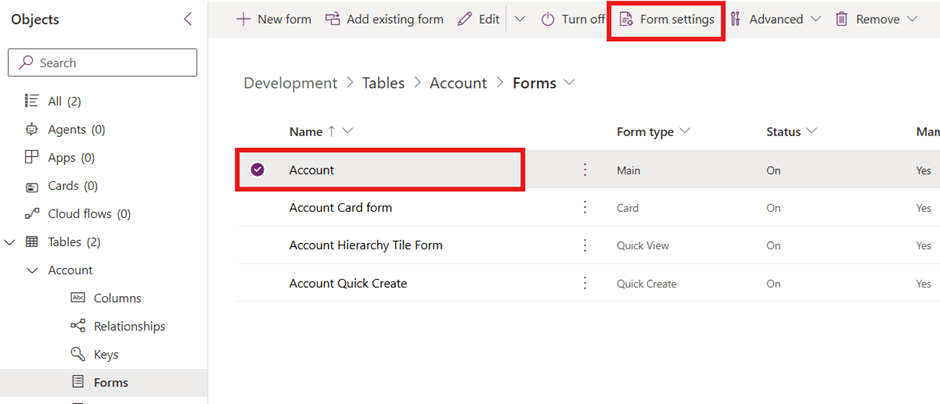
- Select the Form and then click on Main Form Settings.
- You can see it is set to “Everyone”, Turn the checkbox for “Specific Security Roles” and select the required security role from the list. Save and publish the changes.
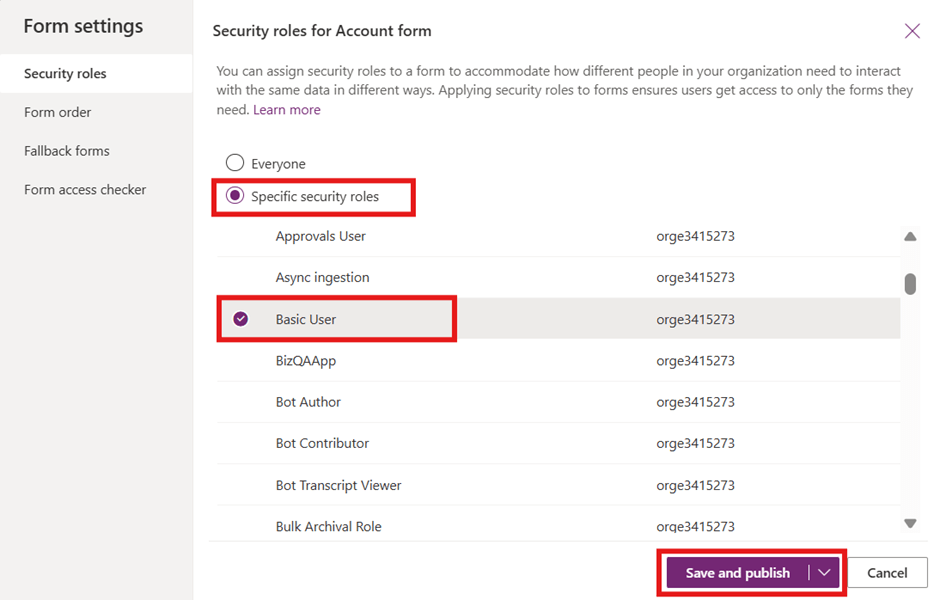
Tip: Assign Main Form only to relevant roles to prevent unnecessary exposure.
Option 2: Customizing Main Form with Model-Driven Apps
- Open PowerApps Studio and navigate to Apps.
- Select the Model-Driven App where the Form is used.
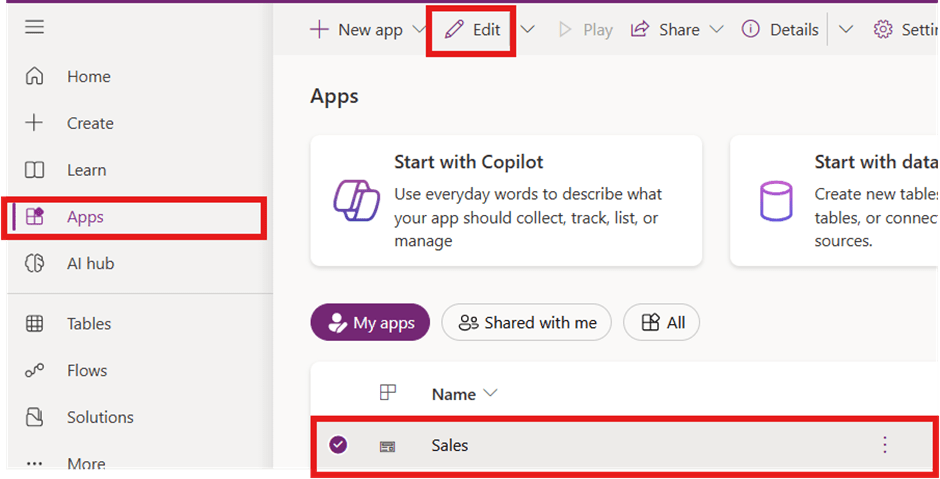
- Click Edit and go to Entity Form Selection.
- Remove unwanted Main Form from the app to hide them from users.
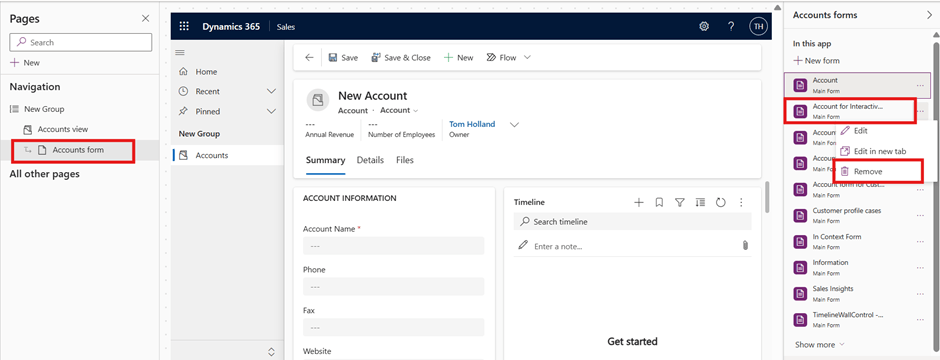
- Save and publish the app.
Tip: This method doesn’t remove the Forms from the system but hides it within specific applications.
Some more useful information related to forms
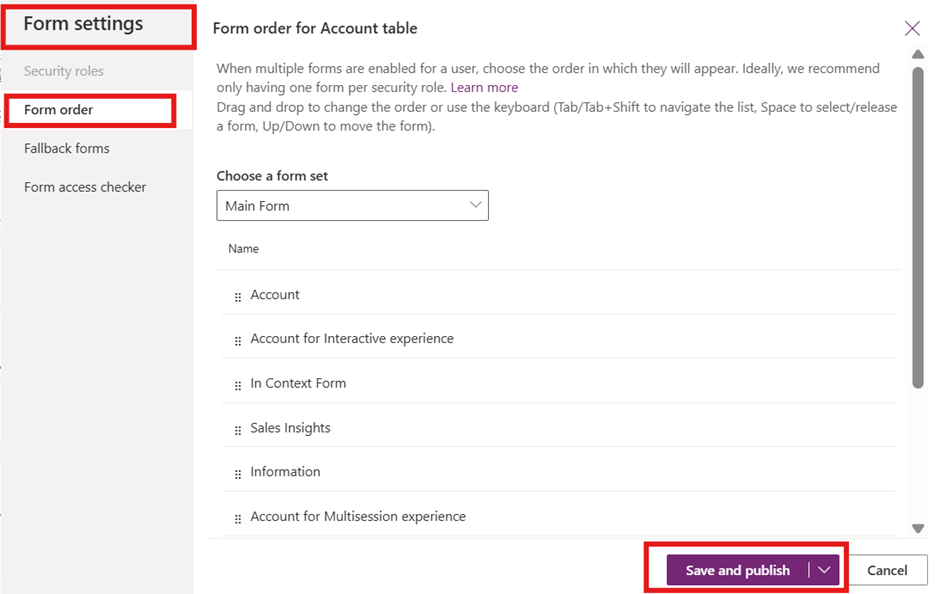
- Form Order: Form ordering in Dynamics 365 CRM allows you to control which forms are displayed by default when users interact with an entity. This is particularly useful when you have multiple forms for a single entity and want to ensure that the most relevant form is shown first. By navigating to Form Settings you can move a selected form up or down in the order, then Save & Publish.
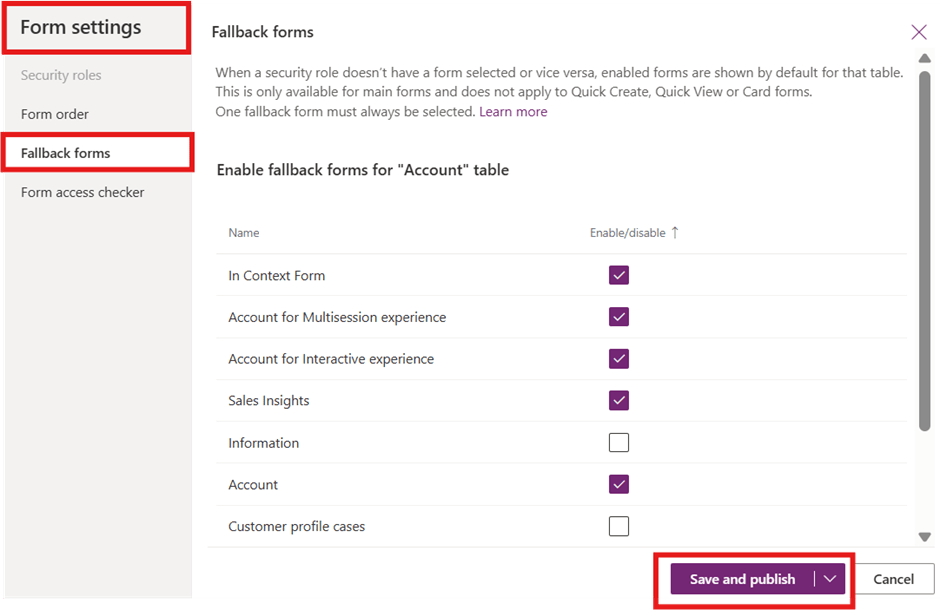
- Fallback form: It is a designated form that is displayed to users whose security roles do not have any forms explicitly assigned to them. This ensures that every user has access to at least one form for a given entity, even if their specific role does not have a custom form assigned.
By navigating to Form Settings, Choose the form you want to set as the fallback form and open it in the form editor, then Save & Publish.
Conclusion
Properly managing access to Main Forms in Dynamics 365 ensures that users only see relevant and necessary data. By leveraging security roles and model-driven app configurations, you can effectively control visibility while maintaining a seamless user experience.
Hope it helps!
If you found this blog useful, please like, share and subscribe my channel for more learning.
#Let’s_Learn_Together
Thanks for reading!

Leave a comment