
Hello Everyone,
Hope you’re doing well!
In this blog, we will understand how to control site visibility.
Introduction
Microsoft Power Pages is a powerful platform that enables organizations to create secure, low-code websites for external and internal audiences. Managing site visibility is crucial to ensure that only the intended users can access the content while maintaining security and compliance.
This blog will walk you through the different site visibility settings in Power Pages, how to configure them, and best practices for managing access.
What is Site Visibility in Power Pages?
Site visibility in Power Pages refers to the ability to control who can access your site. Microsoft provides different levels of visibility settings to ensure that the right users can interact with the site while keeping unauthorized users out.
Key aspects of site visibility:
- Controlling public vs. private access
- Managing permissions through authentication
- Configuring user roles and web page access
- Securing sensitive information
Types of Site Visibility in Power Pages
Power Pages provides several visibility settings that allow you to manage site accessibility effectively:
1. Public Site Visibility
Use Case: When you want your site to be accessible to everyone, such as informational websites, customer support portals, or event registration pages.
- No authentication required
- Accessible by search engines
- Anyone can view the content
How to Enable:
- Go to Power Pages Studio >> Select your site and click Edit.

- Navigate to Security > Site Visibility.

- Enable Public Access.
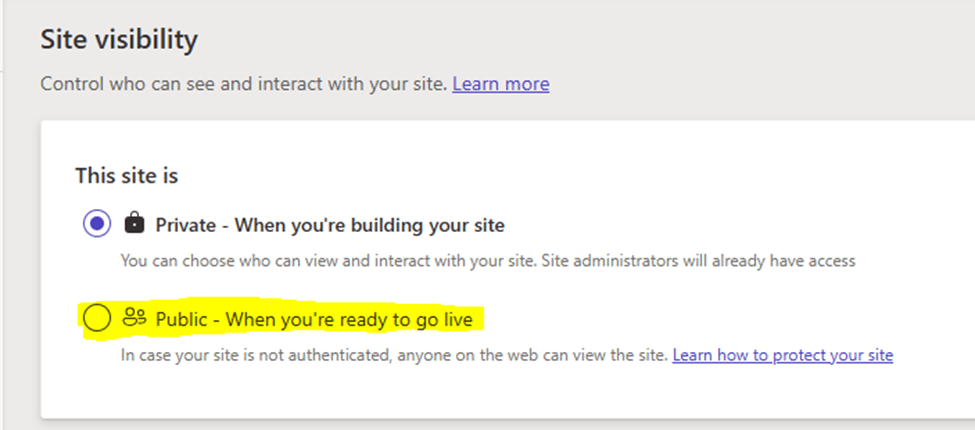
- Ensure that permissions are correctly assigned to anonymous users.
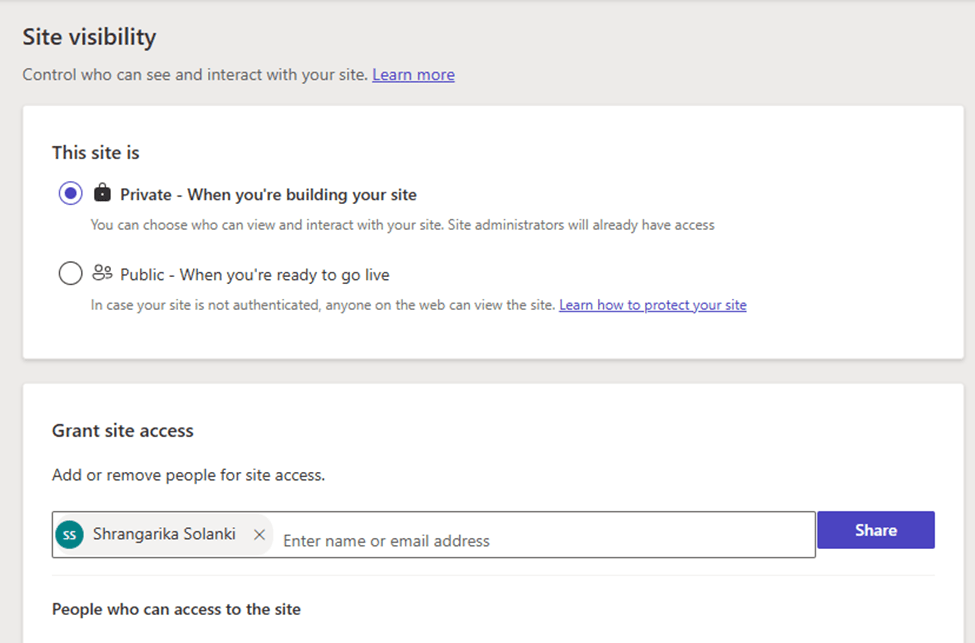
2. Private (Authenticated) Site Visibility
Use Case: When you want to restrict access to specific users then set the Site Visibility to Private.
How to Enable:
- Go to Power Pages Studio >> Select your site and click Edit.

- Navigate to Security > Site Visibility.

- Enable Private Access and add users to access the site under “Grant Site Access”
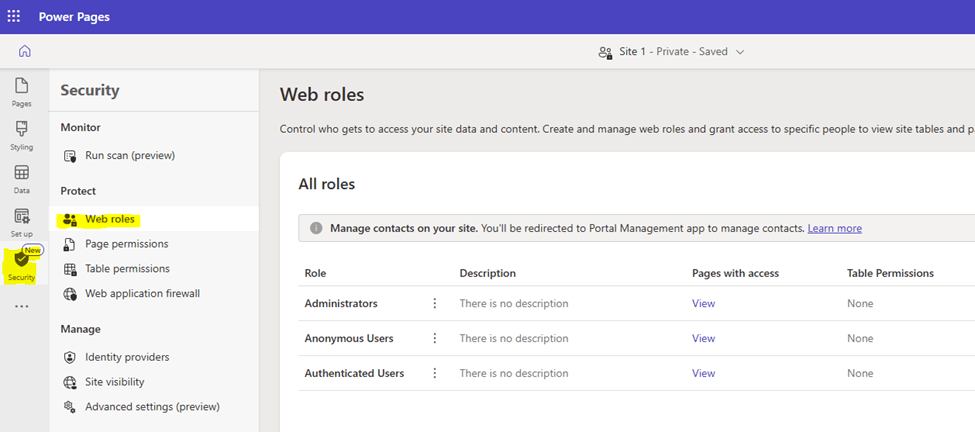
3. Role-Based Site Visibility
Use Case: When different users need different levels of access within the same site, such as customer self-service portals with tiered content access.
- Different user roles have different access permissions
- Requires authentication
- Restricts content at the page level
How to Configure:
- Define Web Roles in Power Pages – Edit your site by following above steps >> Security >> Web Roles
- Assign users to appropriate roles (e.g., Admin, Customer, Partner).
- Set Page-Level Permissions to control access to specific pages.
Conclusion
Site visibility in Power Pages plays a vital role in managing access and ensuring security. Whether you need a public-facing site, a private portal, or role-based access control, Power Pages provides flexible options to meet your business needs.
By configuring site visibility settings correctly, you can enhance user experience, protect sensitive data, and maintain compliance with security standards.
Hope by following above settings, you get an idea to control visibility of your site.
Please subscribe my channel for continuous learning.
Thank you!
#Let’s_Learn_Together #PowerPages #Microsoft365 #D365

Leave a comment