The side pane in Dynamics 365 is a powerful feature that enhances user experience by providing additional context and tools without navigating away from the main workspace. In this blog, we’ll explore how to customize the side pane to fit your specific needs.
Introduction to the Side Pane
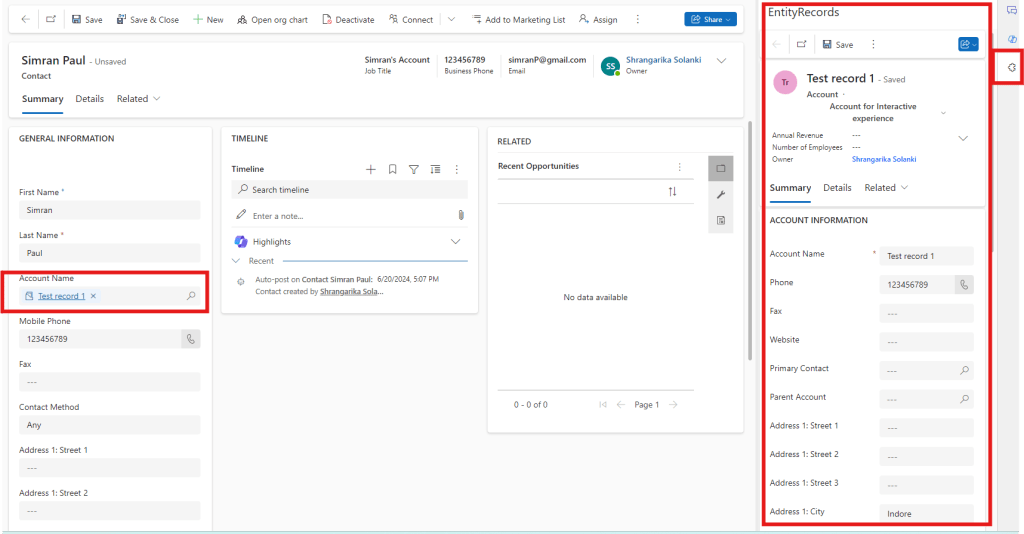
The side pane is located on the right side of the screen in model-driven apps. It can display various types of content, such as entity lists, records, or custom pages. This flexibility makes it an invaluable tool for improving productivity and user engagement.
Step-by-Step Guide to Customizing the Side Pane
1. Creating a New Pane
To create a new side pane, use the Xrm.App.sidePanes.createPane method. This method allows you to specify the title, icon, and whether the pane can be closed by the user.
JavaScript
Xrm.App.sidePanes.createPane({
    title: "My Custom Pane",
    imageSrc: "WebResources/my_custom_icon",
    paneId: "CustomPane1",
    canClose: true
}).then((pane) => {
    // Navigate to a specific page or entity list
    pane.navigate({
        pageType: "entitylist",
        entityName: "account"
    });
});
2. Displaying Different Types of Content
The side pane can display various types of content, including entity lists, records, and custom pages.
- Entity List: Use the following Javascript code if you want to display list of the records
JavaScript
pane.navigate({
    pageType: "entitylist",
    entityName: "contact"
});- Entity Record: Use the following Javascript code if you want to display an individual record within an entity
JavaScript
pane.navigate({
    pageType: "entityrecord",
    entityName: "account",
    entityId: "00000000-0000-0000-0000-000000000000"
});- Custom Page:
JavaScript
pane.navigate({
    pageType: "custom",
    name: "my_custom_page"
});
3. Customizing Pane Appearance
You can adjust the appearance of the side pane by setting properties such as width, hiding the header, and adding badges.
JavaScript
Xrm.App.sidePanes.createPane({
    title: "Detailed View",
    imageSrc: "WebResources/detailed_view_icon",
    hideHeader: true,
    canClose: true,
    width: 600
}).then((pane) => {
    pane.navigate({
        pageType: "entityrecord",
        entityName: "opportunity",
        entityId: "00000000-0000-0000-0000-000000000000"
    });
});
4. Handling Pane Events
You can handle events such as when the pane is opened or closed to add custom logic.
JavaScript
pane.on("open", function() {
    console.log("Pane opened");
});
pane.on("close", function() {
    console.log("Pane closed");
});
Conclusion
Customizing the side pane in Dynamics 365 can significantly enhance the user experience by providing quick access to relevant information and tools. By following the steps outlined in this guide, you can create a tailored side pane that meets your specific needs.
Feel free to experiment with different configurations and content types to make the most out of this feature. If you have any questions or need further assistance, don’t hesitate to reach out!
I hope this blog helps you get started with customizing the side pane in Dynamics 365. If you have any specific requirements or need further assistance, feel free to ask!

Leave a reply to Mark Wittek Cancel reply