
Hello everyone,
Hope you all are doing good!
In our previous blog, we have explored how to style our Power Pages Site. If you haven’t explored it yet, then click here to check it out!
In this blogpost, we will explore how to add a list to your Page. To start, we’ll create or select a table in Dataverse to store your business data. Next, we’ll configure a view from the table to define the columns and structure for your list. Then, we’ll add the list component to a page. For security reasons, users won’t be able to view the information until we set up table permissions.
We’ll cover the following topics:
- Create a Dataverse table
- Add columns to view
- Add a list to the page
- Set up permissions
Create a Dataverse table:
Below are the steps to create a Dataverse table:
- Goto Power Pages.
- From the “Active Sites” list, select the site you want to edit and click on “Edit”.
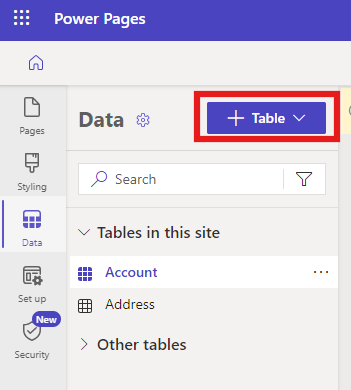
- Click on Data from the left navigation bar.

- Click on “+Table” to create the new Dataverse table and then click on “+New Table”.
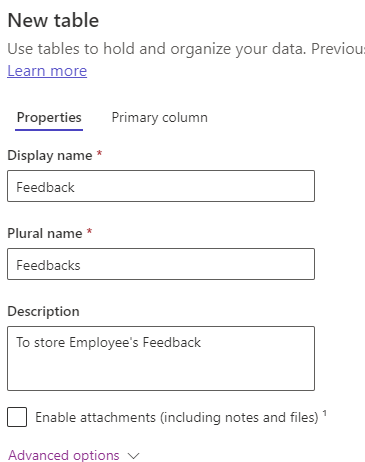
- In the properties pane, enter table’s “Display Name” and “Description”.
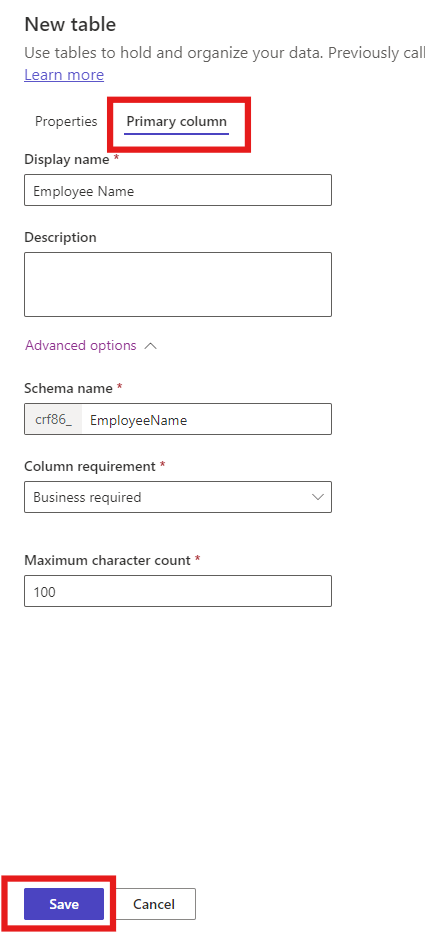
- Click on “Primary Column” tab, give name to your primary column and click on “Save”.
- Click on “+New Column” to add more relevant columns to your table. Here I’ve added following columns in the table
- Supervisor’s name (Data type – Single line of text)
- Suggestions on how to make the work environment more fun? (Datatype –Text Area)
- Are you having issues with your job in your current position? (Datatype – Yes/No)
- Does your manager take ownership and accountability? (Datatype – Yes/No)

Add newly created columns to a View
Below are the steps of adding columns to view:
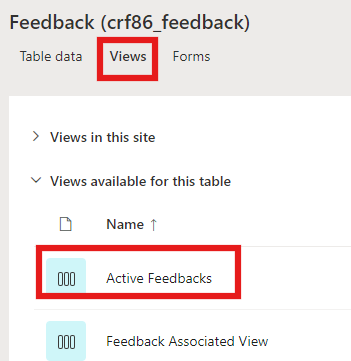
- Click on “Views” and Select “Active Feedback” view.
- Now, click on “Add Columns” and drag and drop all the fields you want to add in a view.
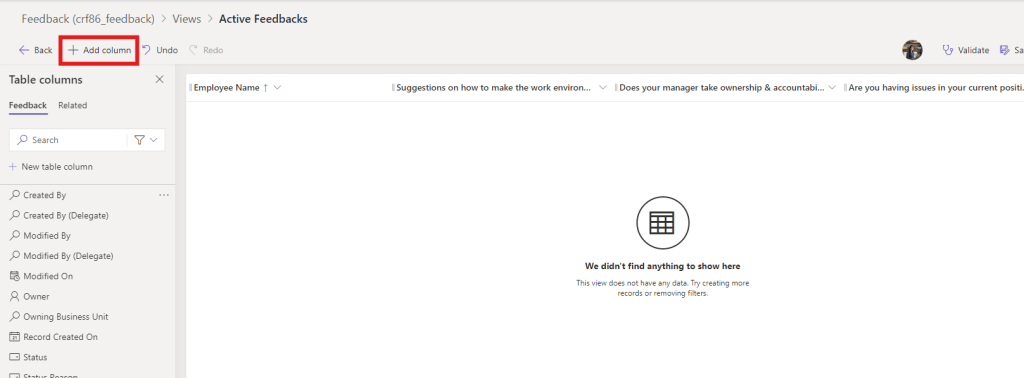
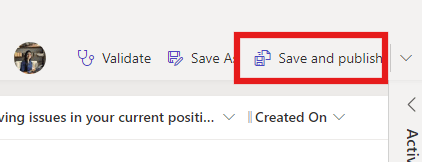
- Click on “Save and Publish” to save your changes.
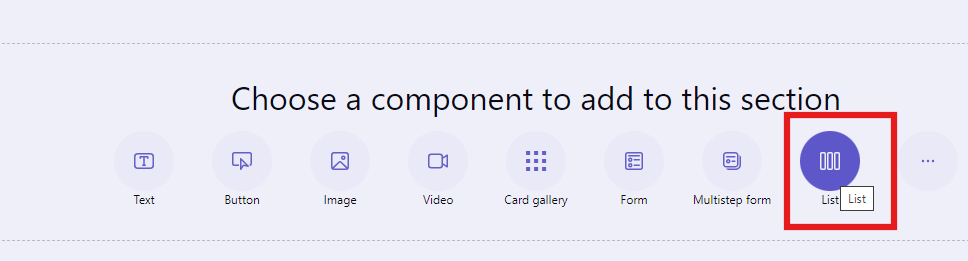
Add a list to the page
Below are the steps to add a list to the page. Lists are used to view information stored in Dataverse.
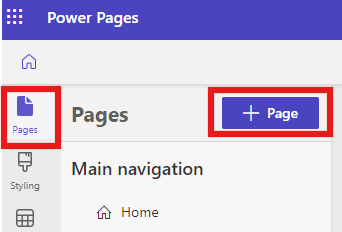
- Click on “Pages” then “+Page”.
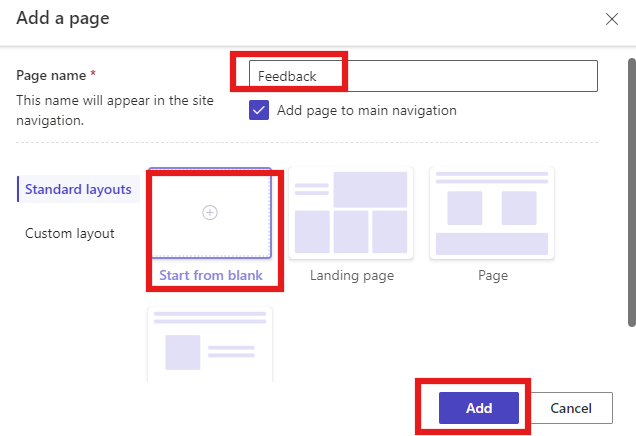
- Give a name to your page and select “Start from Blank” and click on “Add”.
- Select “List”.
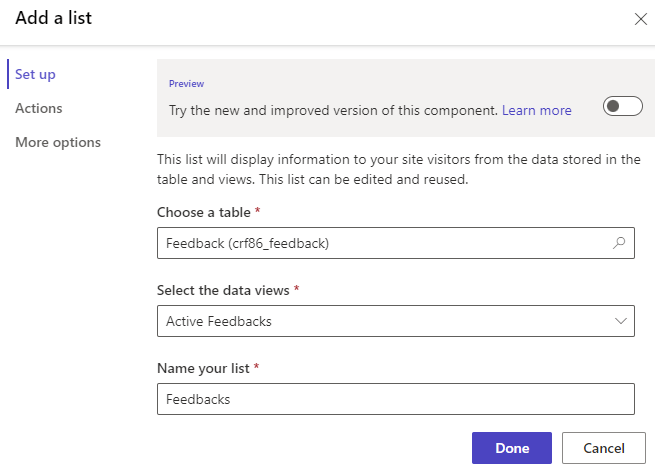
- Under “Set up” tab, choose a table (example – Feedback), Select the data view (Example – Active Feedbacks) and give a name to your list.
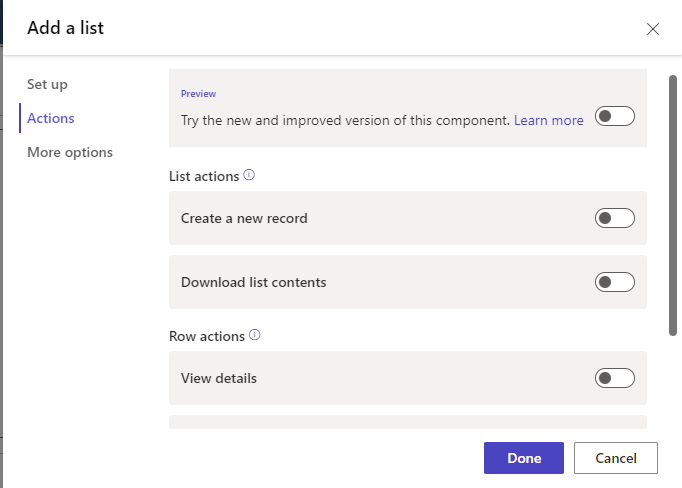
- Select “Actions” tab, you may enable the option to:
- Create a new record: If you want to allow users to create a new record from the list, you can enable this option.
- Download list contents: If you want to allow users to download the table data, you can enable this option.
- View details: If you want to allow users to view individual record then you can enable this option.
- Edit record: If you want to allow users to edit the record within portal then you may enable this option.
- Delete record: If you want to allow users to delete the record from the portal then you may enable this option.
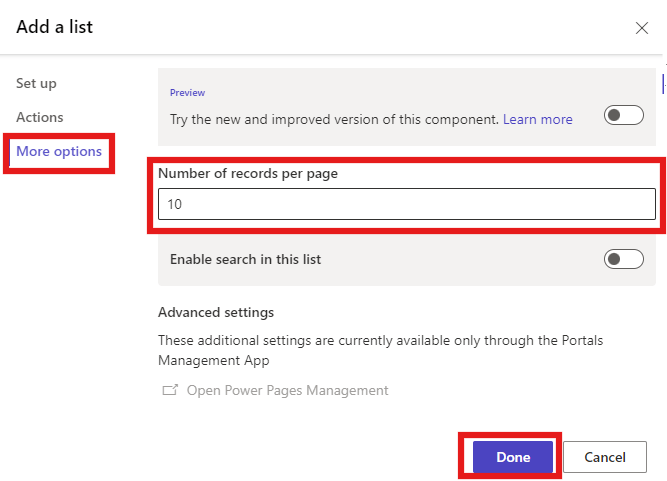
- From “More Options” tab, you may edit the records you want to show per page then click on Done.
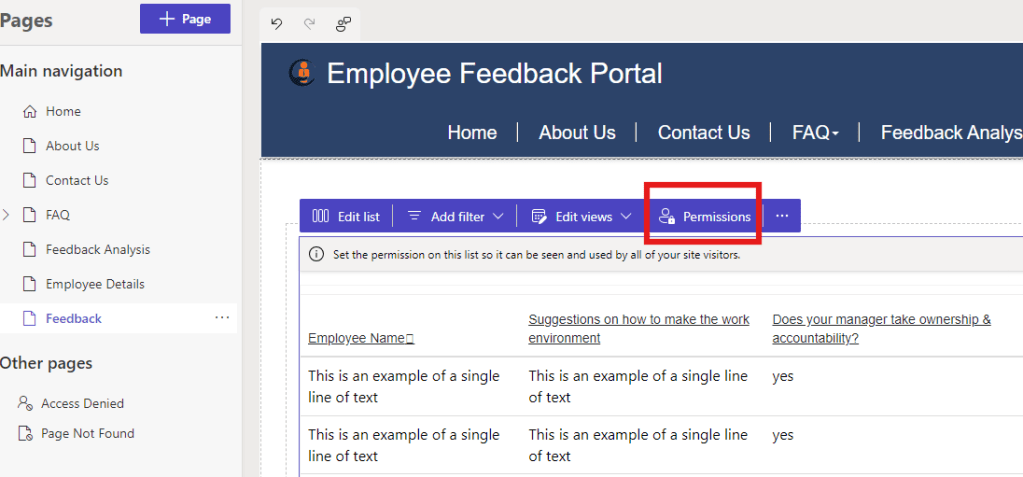
Set up permissions
Permissions are very important to display your data on Power Pages Site. Hence, we need to set up table permissions before launching the site. Below are the steps of setting up permission for “Feedback” table
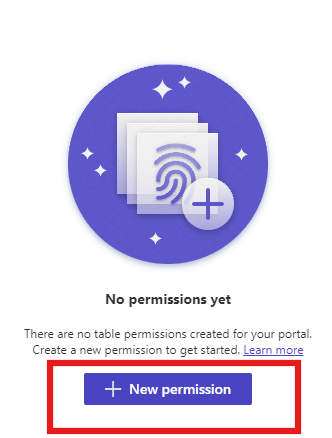
- Select “Permissions”.
- Click on “+New Permission”.
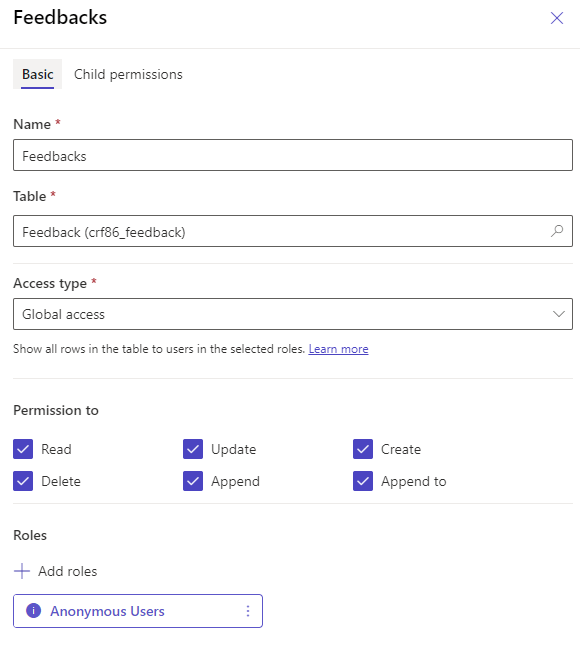
- Give name to your permission and select the necessary permissions and roles for your table and click on “Save”.
- Now, go back to your page, click on “Sync then Preview” from top-right corner of your screen to see the changes.
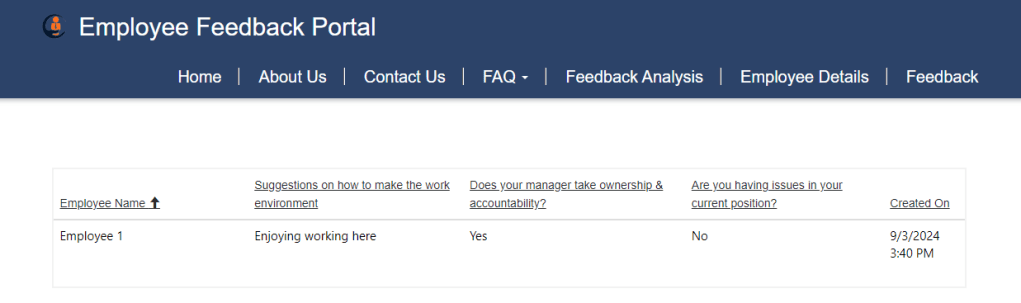
Hope by following the above step-by-step process, you got an idea to add a list to page to view data from Dataverse.
In case of any queries, please leave a comment in the comments section.
Thanks for reading,
Stay tuned with Power Spark for continuous learning.
#Let’s_Learn_Together #Microsoft #D365 #PowerPlatform #PowerApps #PowerPages #Learn

Leave a reply to [Power Pages] – Explore multi-step forms in Power Pages! – Power Spark Cancel reply