
Hello everyone,
Hope you all are doing good!
In this blogpost, we will explore: What is a card gallery and step by step to add card gallery on Power Page.
Card galleries in Power Pages are a great way to organize and display content in a clean, visual format. This step-by-step guide will show you how to easily set up and customize a card gallery for your Power Page.
What is a Card Gallery?
A Card Gallery is a layout that displays items (like products, blog posts, or user profiles) in “cards.” Each card can have an image, text, and links. The cards are arranged in a grid, making the page look neat and easy to navigate.
Why Use Card Galleries?
- User-Friendly: Cards make it easier for users to find and interact with content.
- Mobile-Responsive: Cards adjust automatically for mobile devices.
- Customizable: You can design the layout to fit your website’s needs.
Step-by-Step Guide to Adding a Card Gallery in Power Pages
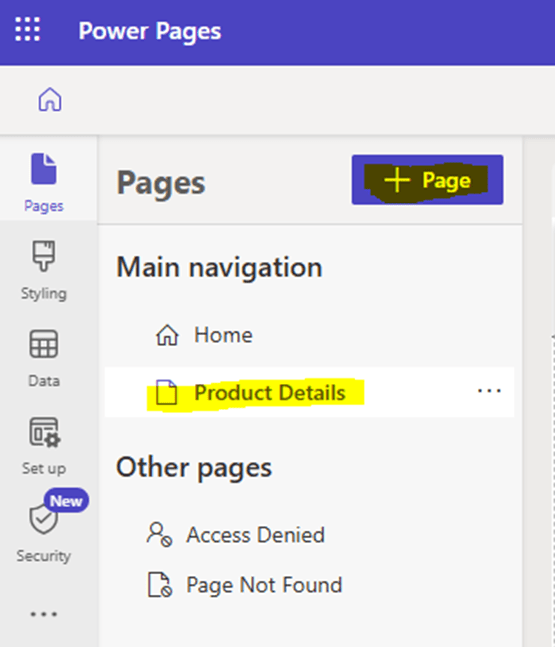
Step 1: Create or Edit a Page
- In the Power Pages design studio, navigate to the page where you want to add the card gallery.
- Here, I have created a new page called “Product Details” to show the active products inside card gallery.
Step 2: Add the Card Gallery
- On the page editor, look for the Card Gallery (a layout component).
- Click to add the Card Gallery to your page.
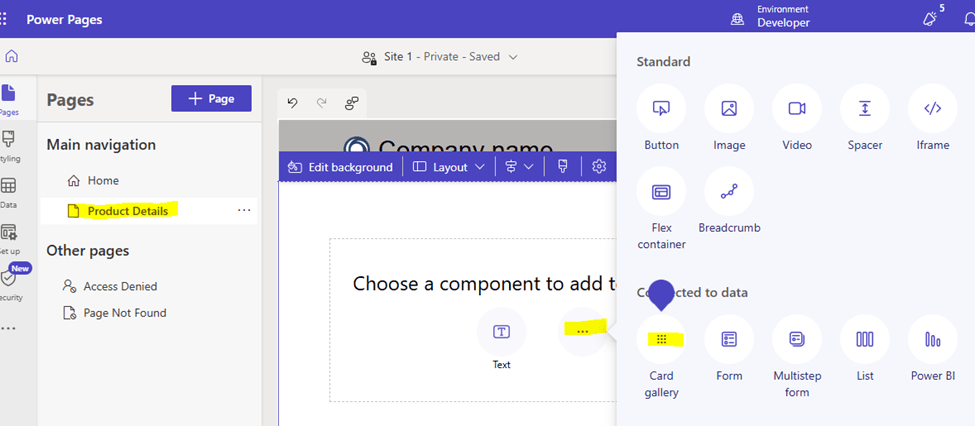
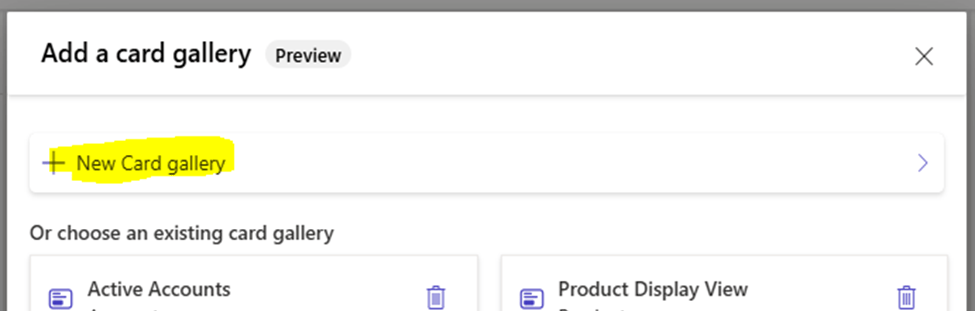
- Select “New Card Gallery”
Step 3: Choose the Data Source
- Card galleries can display dynamic data, so you need to link it to a data source.
- In this example, we are using dataverse table “Products” wherein I have created a custom image column to store images of the products.
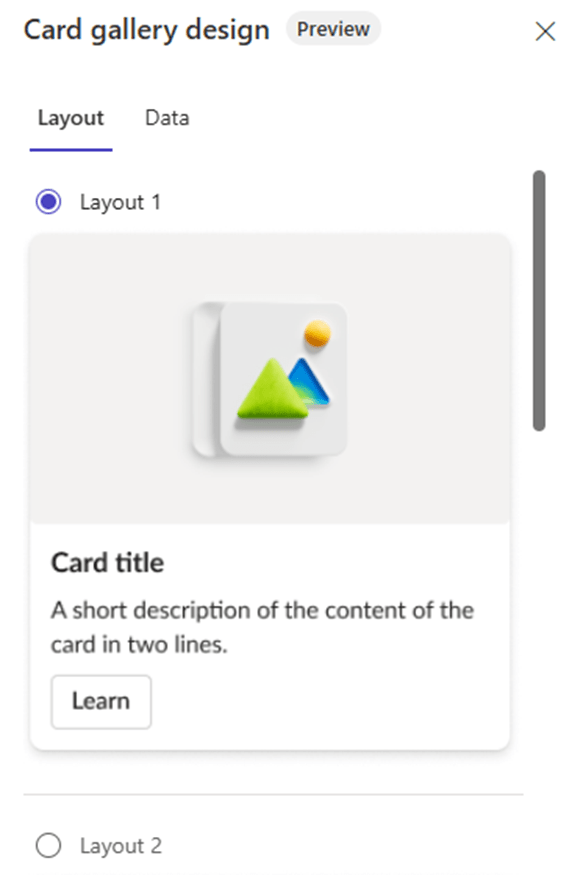
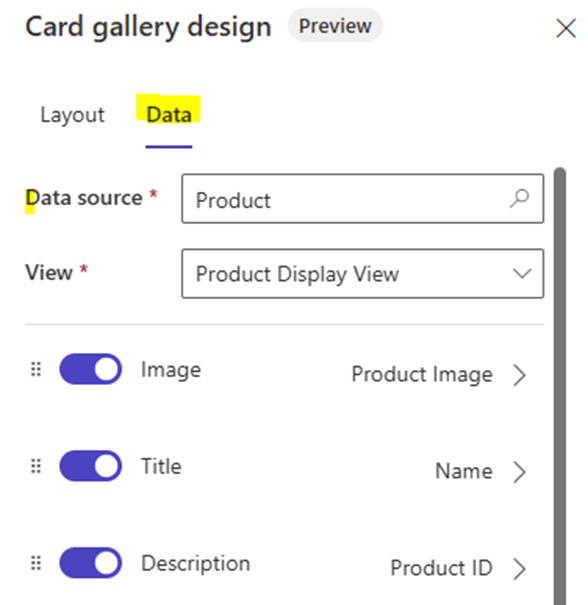
Step 4: Customize the Card Design
- Choose the Layout: From the given options, select the layout
- Data: In the Data tab, Select “Product” as data source and select a respective view. Here, I have created a custom view and added below three columns in the view:
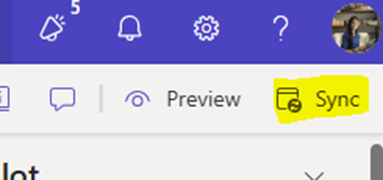
Step 5: Sync and Preview
- Once you’re happy with how the card gallery looks, preview the page.
- Make sure it looks good on both desktop and mobile devices.
- When everything is ready, Sync to make it live!
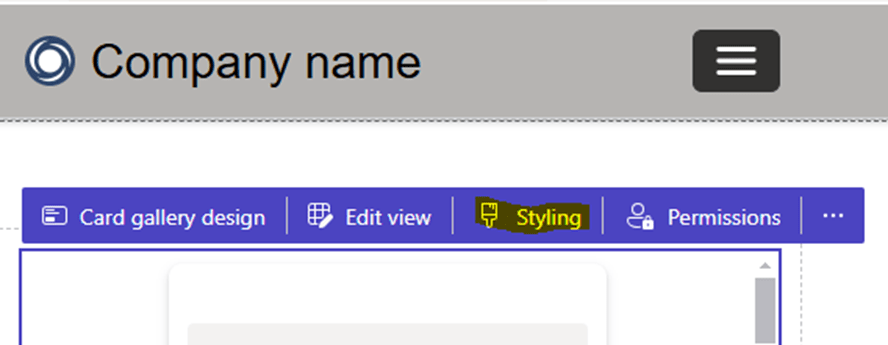
Note: You also may style your gallery by clicking on “Styling” option but it is currently in preview. You also may control the access by setting “Permission”.
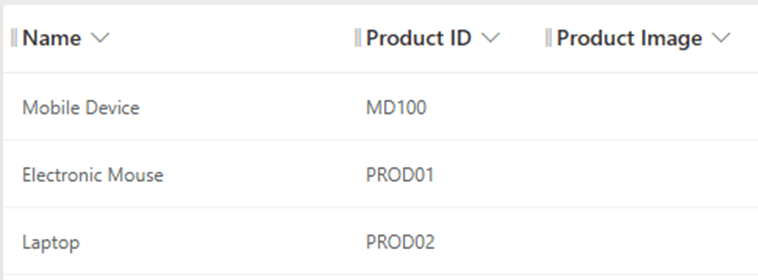
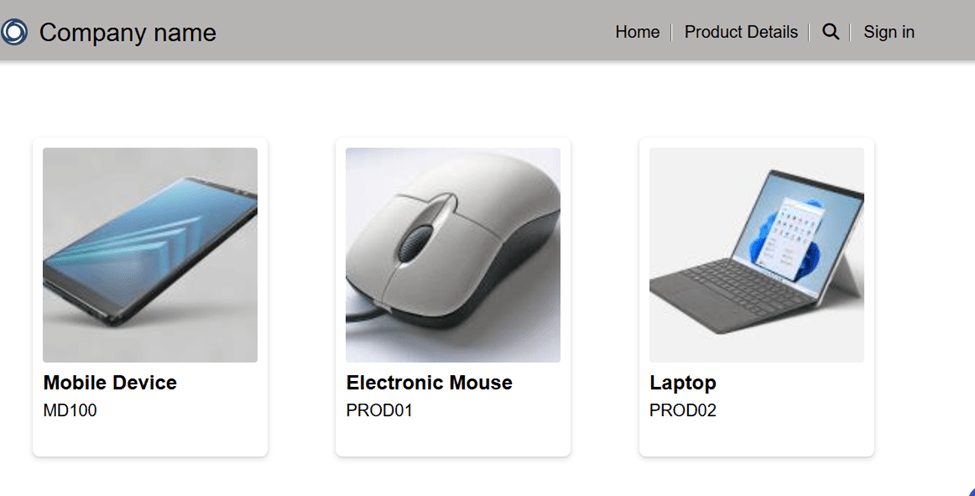
Output:
Once the sync is done, you may see the card gallery as below:
Conclusion
Card galleries are a simple yet powerful way to display content on your Power Pages site. By following these easy steps, you can create a visually appealing and organized layout that improves user experience.
Hope by following above step by step process, you get an idea how to use card galleries on Power Pages.
Please subscribe my channel for continuous learning.
Thank you for reading.
#Let’s_Learn_Together

Leave a reply to Paul Cancel reply